
%2002.jpg)
|
Latest changes: 05 Dec 2023 (01:38 PM ) |
|
SIDEBAR: Go to Lighting for the Addition |
____________________________
Spring to Fall 2020
In mid-August 2020, Kokot excavators from South Deerfield, began work on three separate projects simultaneously at 30 Arnold Road. |
|
|
|
|
|
|
|
Creating a new entry from the garage into the house ... through a mud-room, then into an extension of the dining-room/piano-room that forms a corridor into an expanded kitchen. |
|
Previously - and for the past thirty years - the door from the garage opened directly into the dining room, through which you walked to reach the kitchen. This infelicity has been bothering me ever since I first moved into the house. |
CLICK ON PICTURE TO SEE LARGER PDF FILE

.jpg)
Occasional visitor to the construction site this summer. She is tagged and has a radio collar and Mass. Wildlife people believe she lives around the nearby Pelham reservoir. She seems a little younger and smaller than other bears I've seen. She carefully avoids the electric fence protecting the bird feeders but likes to sniff around the building materials.
CURRENT PROGRESS
|
September 12 pictures: Encouraged by the forecast of mid-week rains, David and Will |
(to be added ...)
|
As of September 7, the "skeleton" of the floor and three walls are in place The two rafters for the roof have been measured and two are installed. The future corridor currently looks like a sun porch ... and it's brightness has put images of skylights in my head. |
%20Addition%20-%20Wide%20View%20CPP%2005a.jpg)
%20Addition%20-%20South%20Window%20CPS%20(1-step)%20CPP%2001.jpg)
Looking from the future mudroom down the corridor. The three windows on the right will fit into the three openings on the left. At the end of the corridor, the sliding door to the kitchen (right) will be installed in the large opening facing. The angled plank shows how the rafters will fit into the current roof line. The plank beneath it is temporary.
%20Addition%20-%20North%20Door%20with%20Rafter%20CPS%20(1-step)%20CPP%2003.jpg)
To the left is the door into the garage. We are facing the back door (which will be accessed by three steps). A wall will split the addition into a corridor and mud room. The slight indentation (about a foot) in the wall-line on the right marks the start of the interior wall. "Indenting" the mud room has the nice effect of breaking up and making more interesting the exterior of the whole addition. (See the first picture above.)
The photo below suggests how sunny the corridor will be.
(The stone wall at the back of the yard will be moved about five feet to the east, which will allow the bird feeders to be placed in front of these windows.)
%20Addition%20-%20Corridor%20Windows%20CPS%20(Smart)%20CPP%2005.jpg)
|
The rest of this section about the Addition will contain a chronological record of its construction. I will eventually reorganize the pictures into separate pages which will make navigation easier. For now, I'll keep adding pictures here as I "develop and print" them. |
LATE SPRING 2020
(after a break of 6 weeks due to COVID)
MOCK UP OF THE ADDITION
David marked off the new corridor in part to demonstrate to me that my bird feeders and their fence would have to be moved during construction.
Note that the old steps (bricks embedded in concrete) have been torn down by and a huge slab of concrete remains to be removed by excavators from Kokot & Sons, South Deerfield.
%2004.jpg)
%2002.jpg)
%20(O7260330)%2003.jpg)
The digging commences while I'm having my breakfast coffee.
%2002.jpg)
Away goes the old bricked "patio" - which lost its purpose
years ago
and was now splashed with tufts of grass and patches of moss.
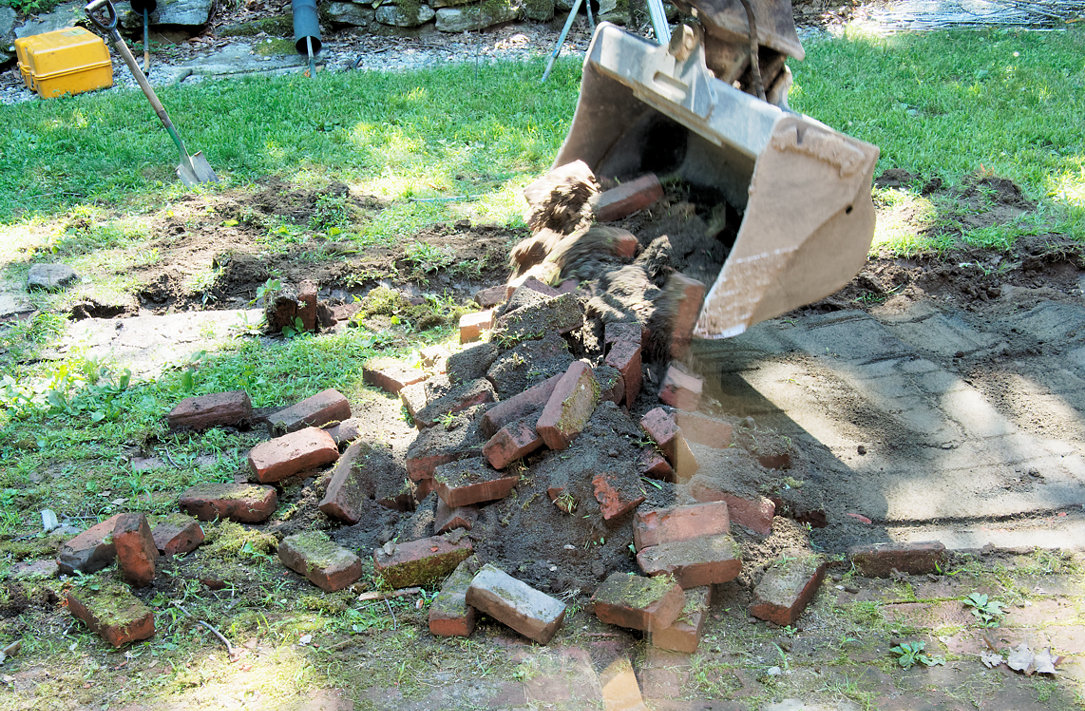
Half-gone...
%20CPP%2004.jpg)
%20CPP%2002.jpg)
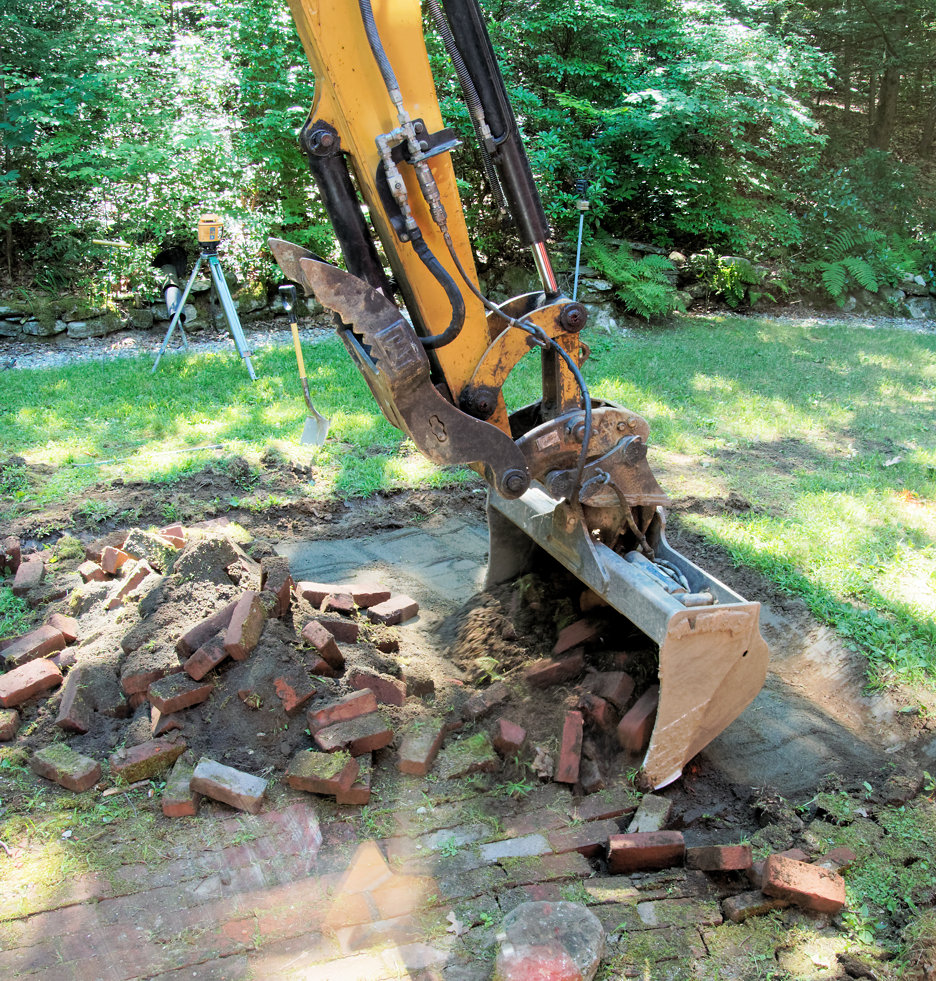
After digging out the bricks, it's time to attack the concrete foundation of the steps into the kitchen. The job is started with a crow bar but heavier machinery will eventually be needed.
%20CPP%2002.jpg)
%20CPP%2003.jpg)
Once the bricks have been removed, the crew from Kokot can start digging a trench that will hold the foundation for the corridor - a half-dozen concrete pylons.
%20CPP%2002a.jpg)
Note the thickness of the concrete slab.
%20CPP%2003.jpg)
During the lunch break, my ever-present woodpeckers - whose feeders have been removed for the day - keep hunting for their suet. Several fly in and out of Kokot's Cat.
%20CPS%20(1-step)%20CPP%2003.jpg)
%20CPS%20(1-step)%20CPP%2003.jpg)
The excavation has gotten deep enough for the SONOTUBES to be installed. Sonotubes are molds that shape concrete (or other materials) into supports for buildings. Here, a half-dozen concrete pillars will hold the weight of the corridor and its roof.
(The designer Jim Culleny, cleverly avoided using a solid foundation with tons of concrete. This would be overkill to support a 7-foot-wide residential corridor.)
%20CPP%2003a.jpg)
Bob - an ace driver of the excavator. His deft touch is extraordinary.
%20CPP%2001.jpg)
Those black cones are the bases of the sonotubes.
%20CPP%2002.jpg)
At this point a mammoth game of Cat's cradle begins. Its goal is to make sure the Sonotubes will line up properly and be the correct height so that the floors and walls will be "in square." (The Thayer Street crew is characteristically fastidious about these details.)
%20CPP%2002.jpg)
%20CPP%2002a.jpg)
David Hrasna has been chief carpenter almost since the beginning of the project. I often think of him as Mr Tapemeasure because every time I turn around, he's double and triple checking one set of numbers or another.
The project manager, Bob Goulet, is equally obsessive about details. (I privately call him Sgt. Math Equation since he spends so much time crunching numbers.) Fortunately for my sanity, David and Bob usually work in geometry, rather than abstract algebra or trig, so I can sometimes keep track of their mathematical fixations. But when David and our newest carpenter, Will, start working with yards of orange strings and 3-4-5 triangles ... I don't even try to keep up.
%20CPS%2002%20(see%20note)%20CPP%2004.jpg)
The base of the sonotube sits on the bare ground.
A long column will be placed on top and both molds will be filled with concrete.
%20CPP%2005.jpg)
%20CPP%2002.jpg)
The tops of the columns must be perfectly flat, so bubble levels are in continuous use.
%20CPP%2004.jpg)
The columns must be precisely perpendicular ... otherwise
I'll
wind up with the Leaning Corridor of Pelham.
%20CPP%2001%20(B).jpg)
No, David's not having a Zen moment.
%20CPP%2008b.jpg)
He's checking the perpendicularity of the next column with a brass plumb line.
%20CPP%2004.jpg)
%20CPP%2004.jpg)
The molds won't be filled with concrete until tomorrow, after Kokot has added layers of dirt and stones that will provide additional support and drainage for the new construction
%20CPP%2002.jpg)
The tops of the concrete columns must be precisely measured and the column's mold trimmed to assure the floor will be flat and at the right height off the ground. You can see how much fill (dirt and stones) is required to reach the level of the subfloor (marked by the temporary wood frames).
%20CPP%2002.jpg)
During all this digging, my Bird Station has become an area of desolation.
%20CPP%2003.jpg)
%20CPS%20(1-step.%20Fill%2030)%20CPP%2003.jpg)
I kept one suet feeder up for the woodpeckers ... and
took it inside
after dark to keep bears away the old-fashioned way.
After all the Sonotube molds are put in place, Kokot refills the excavation with dirt. Then a plastic vapor-barrier is placed on the ground, on top of which workmen spread a thick layer of loose stones.
%20CPP%2003.jpg)
%20CPP%2003.jpg)
%20CPP%2002.jpg)
Kokot's crew completes installing the fill of stones and dirt early one morning. By the time I'm having my morning espresso, the tops of the Sonotubes have been cut down to their correct size and David and Will have begun filling the molds with concrete.
%20Addition%20-%20Digging%20Foundation%20Concrete%20CPS%20(1-step)%20CPP%2002.jpg)
%20Addition%20-%20Concrete%20CPS%20(1-step)%20CPP%2002.jpg)
%20Addition%20-%20Concrete%20Mixing%20CPP%2004.jpg)
%20Addition%20-%20Will%20Pouring%20Cement%20(CPS%201-step)%20CPP%2002.jpg)
Making the funnel was Will's idea. He's spent 25 years in construction in Louisiana and brings a different region's savvy (and building-trades' terminology) into New England.
%20Addition%20-%20Concrete%20Mix%20CPP%2004.jpg)
%20Will,%20David,%20Concrete%20CPS%20(1-step,%20crop)%20CPP%2004.jpg)
%20Addition%20-%20Concrete%20Mix%20CPP%2005.jpg)
Between David's feet, note the Sonotube filled with wet concrete.
%20Addition%20-%20Concrete%20Column%20Check%20CPP%2003.jpg)
"Just quintipple-checking the alignment."
David confirms that the column is lining up dead-center.
%20Addition%20-%20Concrete%20Tops%20CPS%20(1-step)%20CPP%2002.jpg)
A threaded steel rod has been inserted into the hardening concrete. This will provide a secure connection between the corridor's structure and the pylons supporting it.
%20Addition%20-%20Top%20of%20the%20Concrete%20Pylon%20CPP%2002.jpg)
%20Addition%20-%20Column%20top%20measuring%20CPS%201-step)%20CPP%2002.jpg)
(... just checking ...) Will, this time.
%20Addition%20-%20Concrete%20Pylon%20Tops%20CPP%2004.jpg)
The six concrete columns, ready for the installation of the sub-floor. Five stand along the outside wall, one is placed towards the end the interior wall that will divide the corridor from the Mud Room (the new entrance from the garage.)
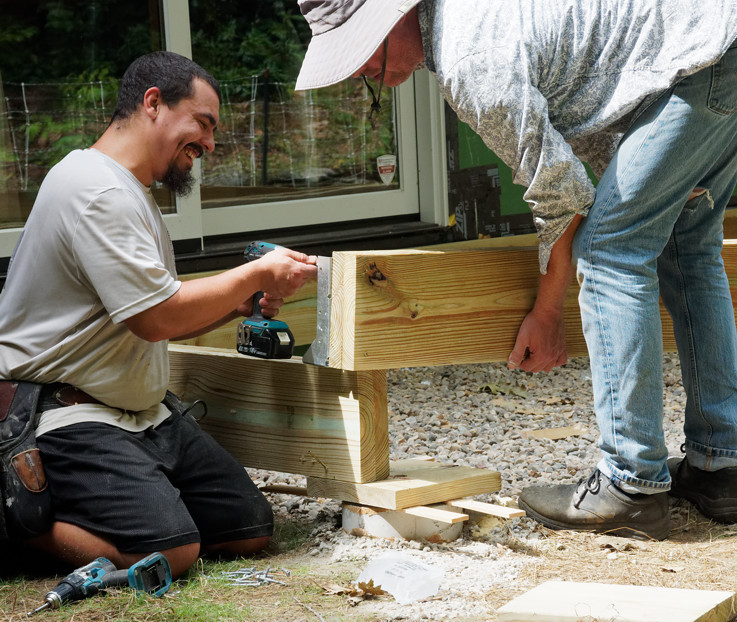
The building of the floor box begins with the attachment of wooden blocks to the tops of the concrete columns.
%20Addition%20-%20Wood%20tops%20of%20pylons%20CPS%20(1-step)%20CPP%2002.jpg)
David screws a bolt onto the threaded steel rod to keep the wood in place.
%20Addition%20-%20Wood%20Tops%20of%20Pylons%20CPS%20(1-step)%20CPP%2005.jpg)
%20Addition%20-%20David%20measures%20wood%20blocks%20CPS%20(1-step,%20Fill%2025)%20CPP%2004.jpg)
Hey! Look what David's doing. ... Again.
Will and David can now build a thick wooden box on top of the pylons that will support the floor of the addition.
%20Addition%20-%20Building%20Floor%20Bed%20CPS%20(1-step)%20CPP%2004a.jpg)
%20Addition%20-%20Building%20floor%20box%20CPP%2002a.jpg)
%20Addition%20-%20David%20Floor-Box%20T-square%20CPP%2005.jpg)
%20Addition%20-%20Building%20Floor%20Box%20CPS%20(1-step,%20Red%20-4,%20Green%20-3)%20CPP%2002.jpg)
%20Addition%20-%20Building%20Floor%20Box%20CPP%2004.jpg)
Sometimes the whole world seems to be "out of square."
%20Addition%20-%20David%20perplexed%20CPP%2003.jpg)
But the perplexity last only a moment. The join is fine.
%20Addition%20-%20Building%20Floor%20Box%20CPP%2002.jpg)
. . . (sequence incomplete)
%20(P8140509)%2002.jpg)
.jpg)
The completed frame for the floor.
%20CPP%2006%20CPS%20(Dodge%20and%20Burn).jpg)
More digging? Yes. David and Will have to lay a separate concrete foundation for the back steps. No dozer needed here, just a few hours of shovels ... and picks since the ground turns out to be a healthy variety of New England soil - stuffed with rocks.
. . . (sequence incomplete)
.jpg)
.jpg)
. . .
After the floor box bottom and sides have been completed, the carpenters can't do any more work until the structure is insulated - using the same blown foam that we've been using throughout the house.
%20(P8280647).jpg)
View from the second story, showing the new location of the birds and the "spaceman" who is going to handle blowing in the foam insulation
.jpg)
Putting down the subfloor.
.jpg)
.jpg)
Meanwhile, back inside the dining room, part of the ceiling has to be
removed so the joists for the corridor's roof can be
installed.
.jpg)
.jpg)
.jpg) |
.jpg) |
After removing the old plaster and lath, plywood will cover the hole for a few weeks.
%20CPP%2004.jpg)
The picture below shows how much has been "demoed" (i.e. demolished) in the dining room.
.jpg)
. . . (incomplete)
.jpg)
The Walls begin as low boards along the edge of what will be the inside of the wall.
.jpg)
This first wall went up in one day.
.jpg)
.jpg)
Note the concrete-filled Sonotube in the lower-left-hand corner of picture.
.jpg)
|
MORE TO COME ... |